Project Setup
Let's Launch Visual Studio

Visual Studio is our Integrated Development Environment (IDE). IDEs integrate common development tasks with our text editor.
Creating a Console Application
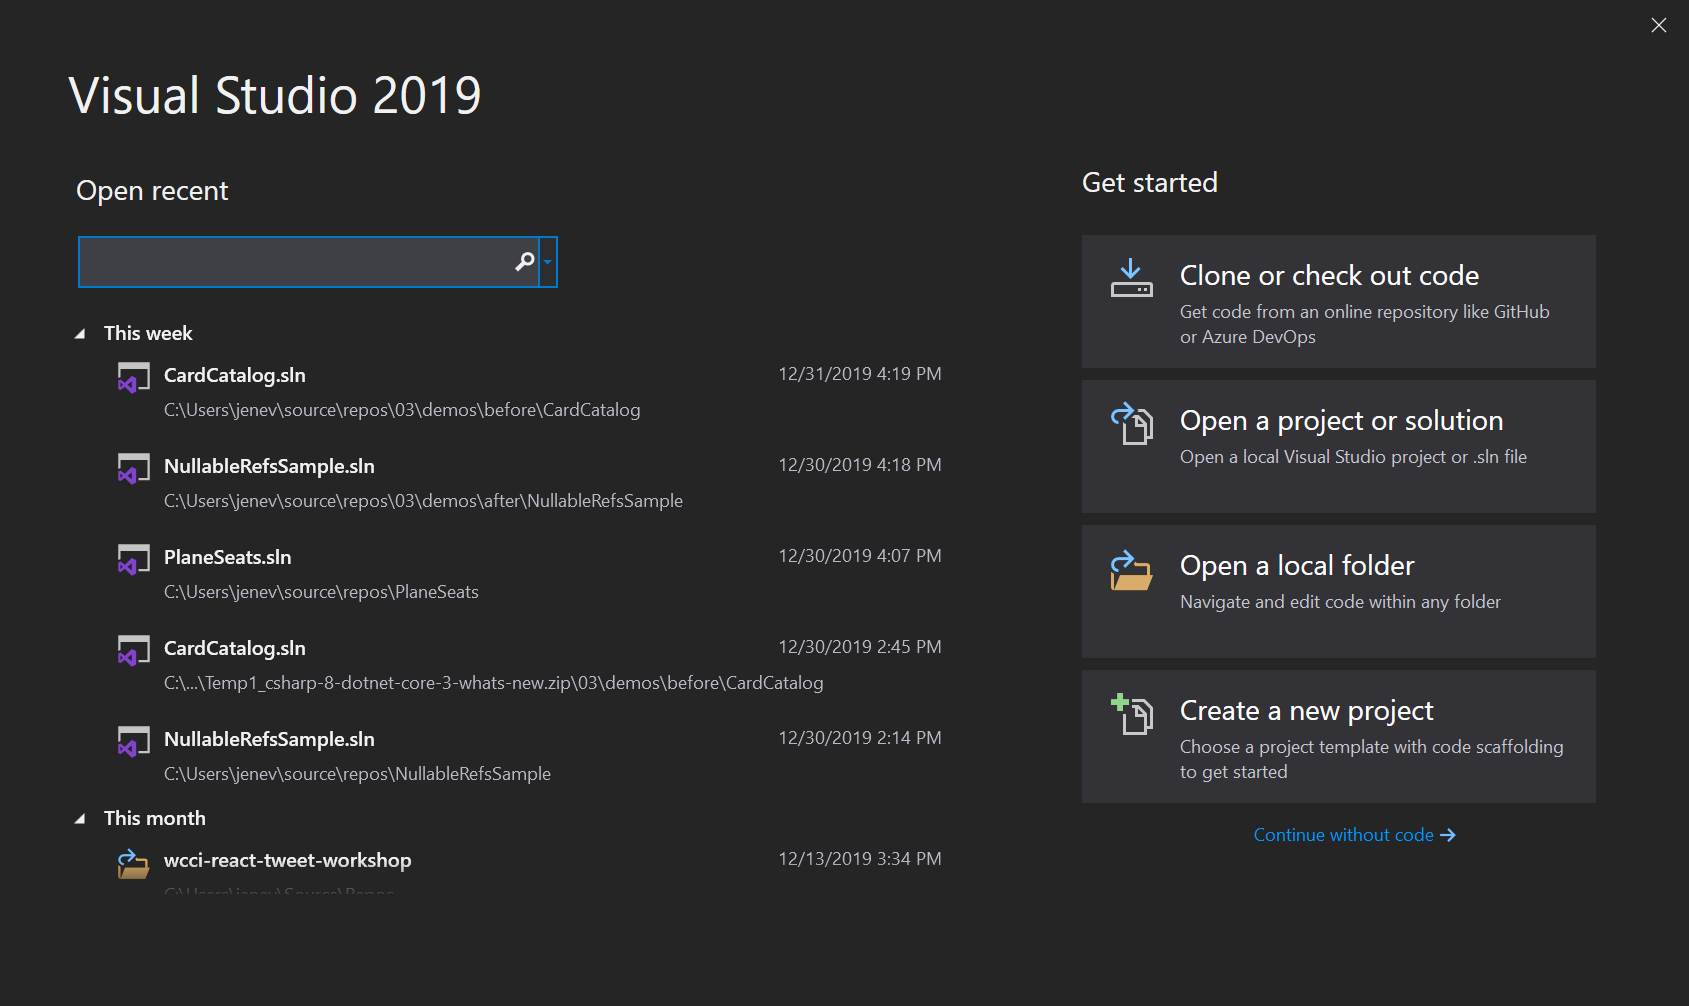
- Open Visual Studio 2019. A start window will open.
- Select Create a new project, located on the right side of the screen under Get started.
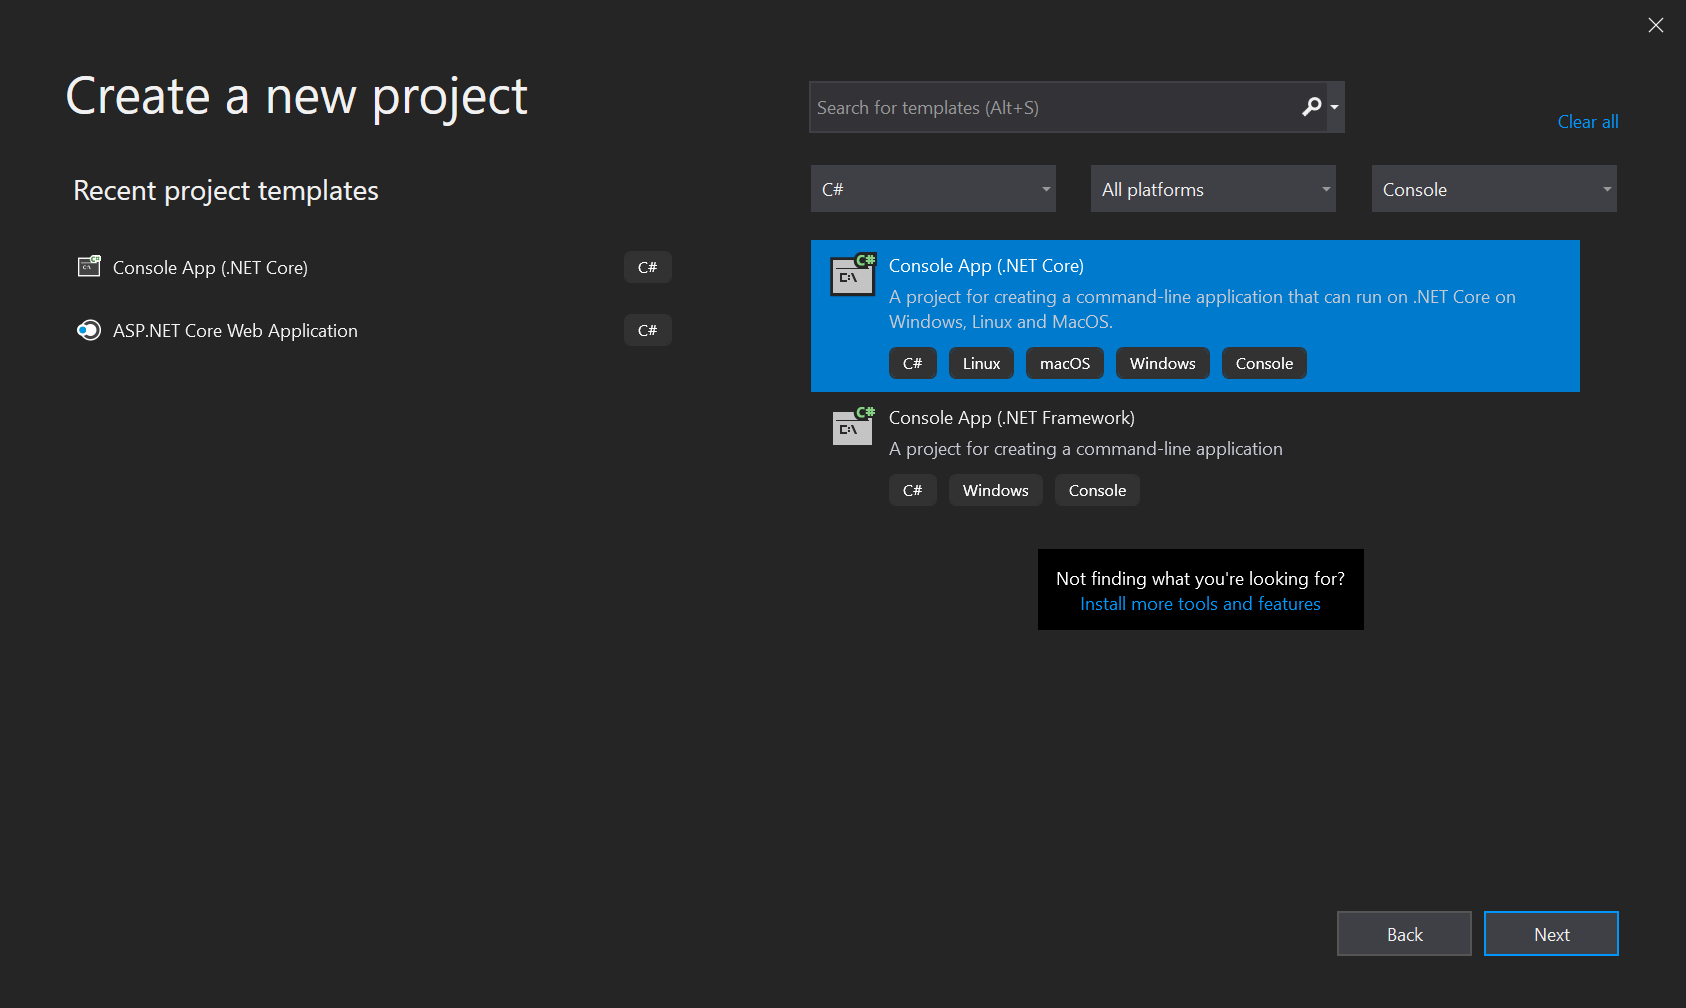
- On the Create a new project page let's search for the Console App (.NET Core) template.
- You can narrow your search by typing "Console App (.NET Core)" into the search box, or by selecting a specific language (C#) and project type (Console).
- When the list of project templates has been narrowed down, click on the Console App (.NET Core) template to highlight it and then click Next.
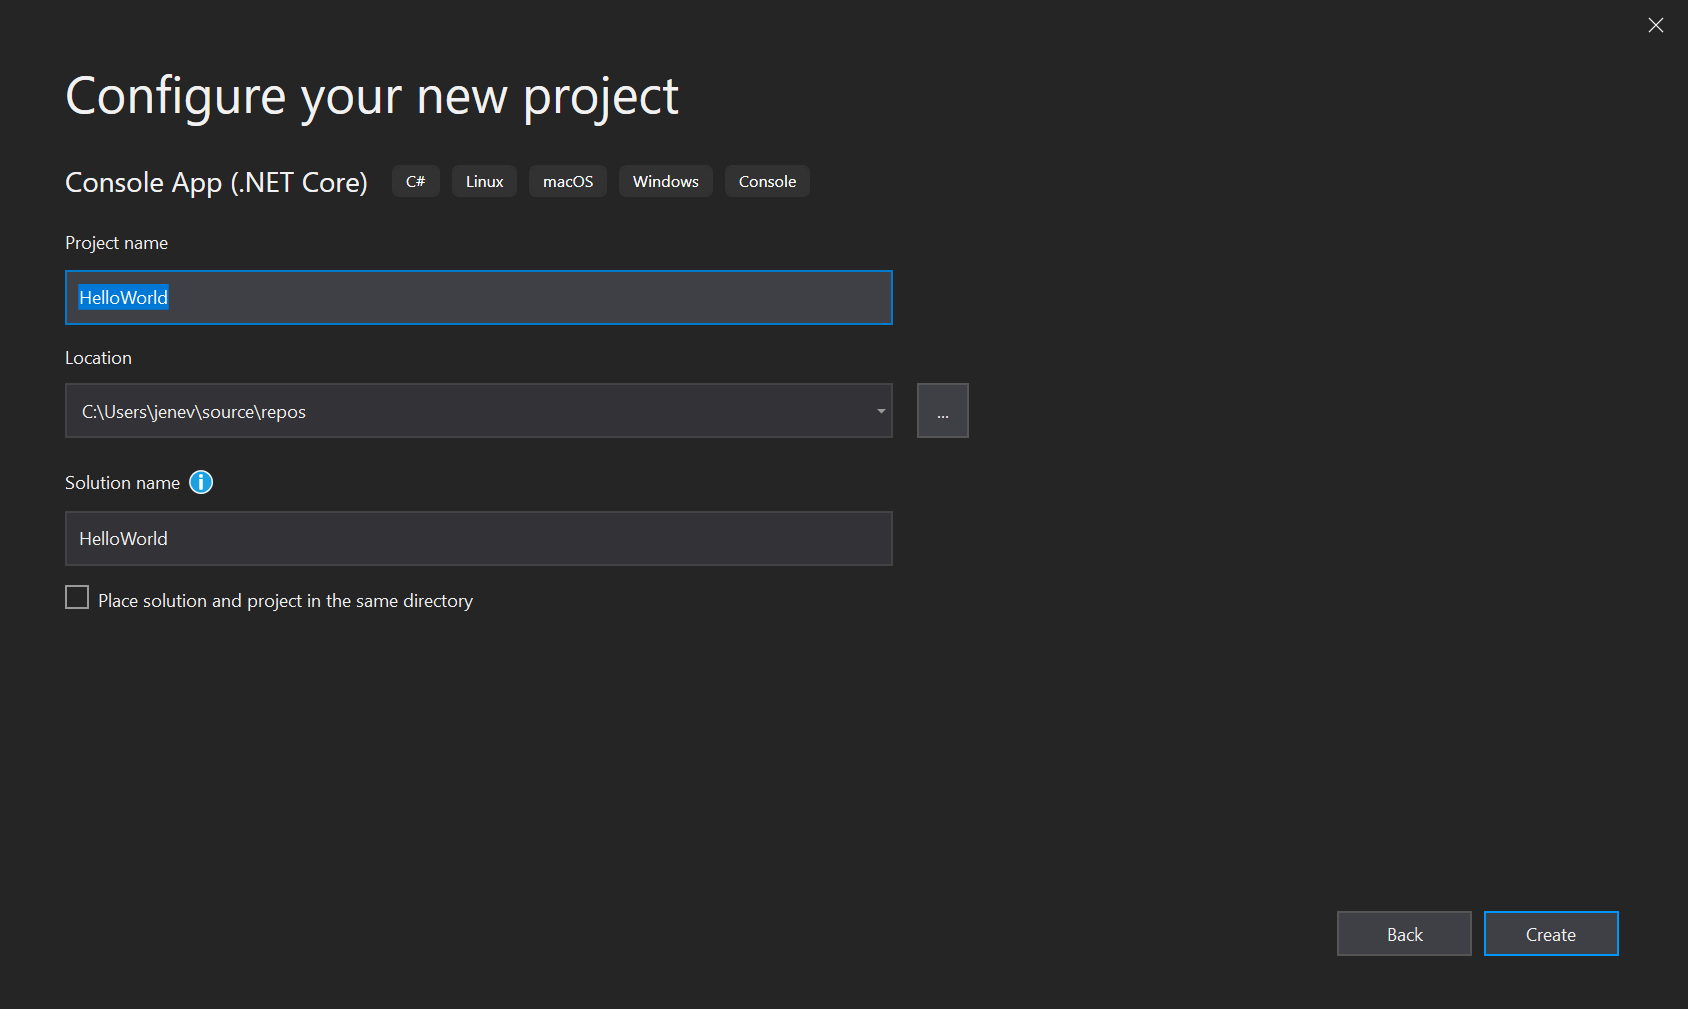
- On the Configure your new project page, enter the project name
HelloWorld. - Check that the Location field is referencing the appropriate folder location on your laptop. It should be set up to default to the
source\reposfolder of your home directory. - When Project name, Location, and Solution name fields have been completed, click the Create button.
Now You've Got Class!
You should see code similar to the following in your editor:
using System;

namespace HelloWorld
{
    class Program
    {
        static void Main(string[] args)
        {
            Console.WriteLine("Hello World!");
        }
    }
}
Let's Break It Down
C# Classes
using System;

namespace HelloWorld
{
    class Program
    {
        static void Main(string[] args)
        {
            Console.WriteLine("Hello World!");
        }
    }
}
All C# code is found inside a class. This class is called Program.
Methods
Think of Methods as the messages that we send in C#. All C# applications start with a Main method.
using System;

namespace HelloWorld
{
    class Program
    {
        static void Main(string[] args)
        {
            Console.WriteLine("Hello World!");
        }
    }
}
Curly Brackets
Curly brackets ({ and }) indicate code blocks in C#. An opening curly bracket ({) must always, always, always have a corresponding closing curly bracket (}).
This applies to classes…
using System;

namespace HelloWorld
{
    class Program
    { // <== Open
        static void Main(string[] args)
        {
            Console.WriteLine("Hello World!");
        }
    } // <== Close
}
… as well as methods.
using System;

namespace HelloWorld
{
    class Program
    {
        static void Main(string[] args)
        { // <== Open
            Console.WriteLine("Hello World!");
        } // <== Close
    }
}
Comments
We can add comments to our code to explain it. They don't do anything.
using System;

namespace HelloWorld
{
    class Program
    {
        static void Main(string[] args)
        {
            // The next line writes a string to the console.
            Console.WriteLine("Hello World!");
        }
    }
}
Here's how we can comment out multiple lines:
using System;

namespace HelloWorld
{
    class Program
    {
        static void Main(string[] args)
        {
            // You can comment out more than one line.
            // Just like this.
            Console.WriteLine("Hello World!");
        }
    }
}
Here's an easier way to comment out multiple lines:
using System;

namespace HelloWorld
{
    class Program
    {
        static void Main(string[] args)
        {
           /* If you need to comment out a large block of code, it's easiest to use this style. */
            Console.WriteLine("Hello World!");
        }
    }
}
Hello World?
A common first program for people to write in a language is a program that says "Hello, World!" That's just what we'll do.
The IDE already did this for us, so let's add a goodbye message.
using System;

namespace HelloWorld
{
    class Program
    {
        static void Main(string[] args)
        {
            // The next lines write strings to the console.
            Console.WriteLine("Hello World!");
            Console.WriteLine("Goodbye World!");
        }
    }
}
Console represents our console/terminal/command line. Here we are sending a WriteLine message to Console with the argument "Hello World!".
Let's run it, and see what happens!
A Flash of Success
Click the green "Play" button on your top toolbar to run the application. This button executes our code in the debugging mode.

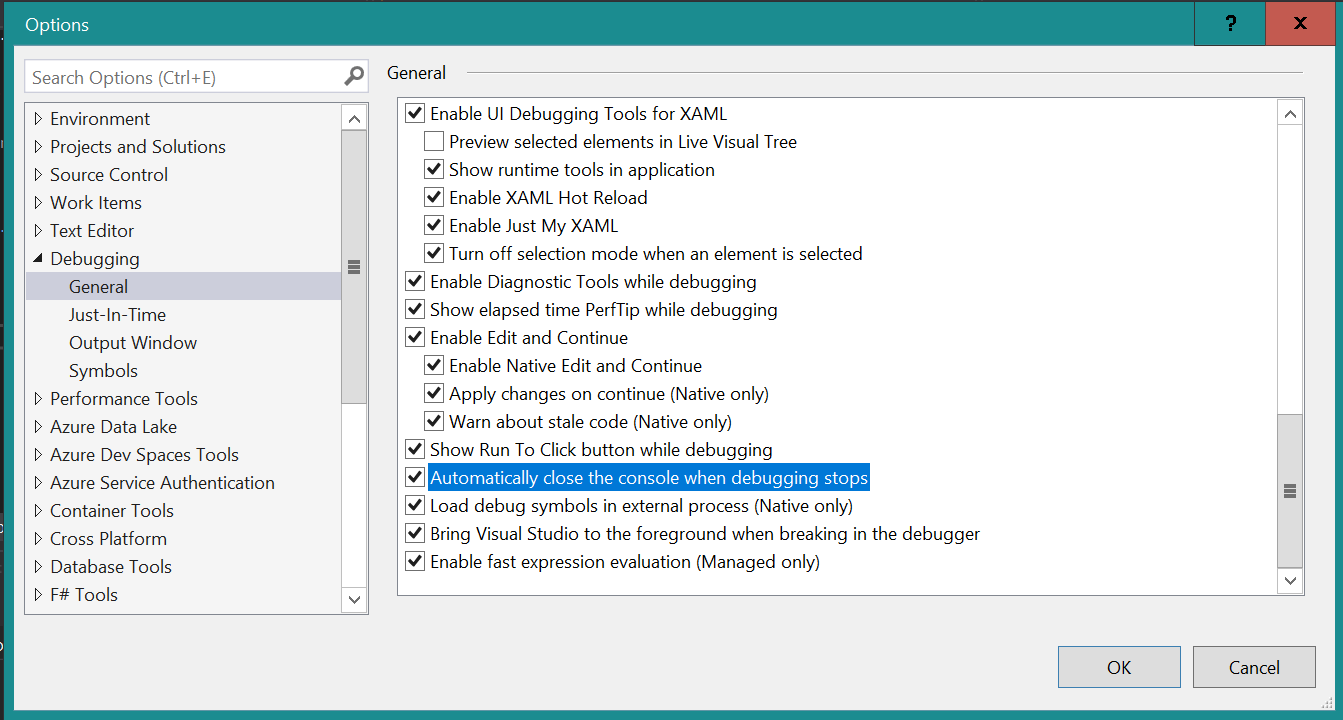
You will see a black screen (terminal) pop up that shows the results of our application, in addition to some instructions...
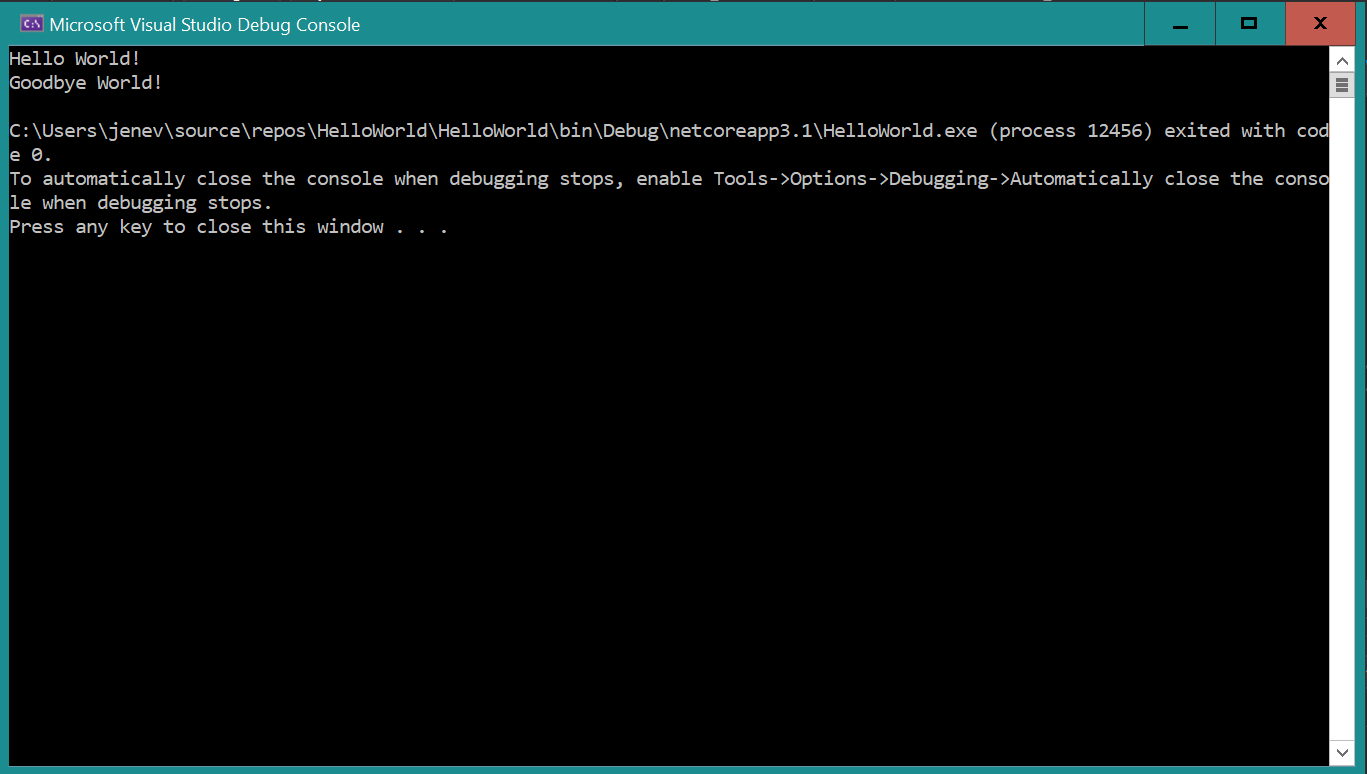
The instructions tell us how to automatically close the console when debugging stops. Let's follow the directions to change our setting...
Now let's click the Play button again and see what happens. Now we see the terminal pop up and then immediately disappear.
What's that all about?
Slowing Down
It turns out, or program runs and finishes so fast that you can't even see the results!
We need the results to hang out for a moment so we can take a look.
Add the following line of code to the end of your Main method:
Console.ReadLine();This ReadLine will wait for the user to hit enter to continue. It's a nice easy way to stop and wait.
Run the program again
Success
You should see:
Hello, World!
Goodbye World!
Climactic, eh?
You've written your first C# program. Congratulations!
Next Steps
C# is a strongly-typed language. The type of "Hello, World!" is String, which is denoted by the double quotation marks:
Console.WriteLine("Hello, World!");We can also do this with other Strings:
Console.WriteLine("I can code it!");Other Data Types
We can also display numbers and more complex expressions.
Console.WriteLine(42);
Console.WriteLine(1.23);
Console.WriteLine(2 + 3);
Try a few of your own! We'll talk about other data types and expressions in days to come.