DOM Manipulation via the DOM API
Probably the biggest tool we have in front end JS is the DOM API. This is what allows us to dynamically populate our pages with elements based on data being updated. Let's look at some code to see how this works. Let's look at referencing DOM elements first:
<!-- index.html -->
<body>
  <h1 id="title">Here's my title</h1>
</body>
// app.js
// This tells our browser that we are
// referencing this specific element
// and sets it to a variable.
const title = document.getElementById("title")Accessing Attributes
Let's now look at what we can do with the element we've grabbed:
const title = document.getElementById("title")
// This will set the text inside of our #title to a new value
title.innerText = "This is dynamically set text."

// But what if we want to add HTML element?
title.innerHTML = "This is <span>dynamically</span> set text!"
This allows you to put actual HTML elements into your element via a string. We can now manipulate this span with CSS!
We can also work with attributes on the element (i.e. things like href or type).
// This gives us a variable with the value
// of the ID attribute.
const titleId = title.getAttribute("id")
We can also see if an element has an attribute and, if so, examine what its value is.
// This returns us a boolean value
// of false because our 'h1' element
// doesn't have an 'href' value
title.hasAttribute("href")
Remove Elements
The same way we can manipulate elements, we can remove them:
// The remove method is built into the DOM API
// and deletes an element from our document for us.
title.remove()
Query Selector
So we find ourselves selecting elements in a very clumsy way. There seems to be a different way to find each element in the DOM API. Why not one way? BECAUSE THERE ARE TWO! .querySelector('thing') and .querySelectorAll('things').
// This selects the first element of
// its kind in the document.
document.querySelector("h1")

// This selects a group of things
// that have the parameter in common.
document.querySelectorAll(".content")
This way we can select elements more dynamically.
Event Handlers
Event handlers are the way we deal with interactivity. So, for example, if we want to change the way our heading is sized when our user clicks on it, we can!
const title = document.querySelector("#title")

// This is going to make your 'h1' tag(s)
// be '50px' when you click it
title.addEventListener("click", function() {
  title.style.fontSize = "50px"
})
We can also add event listeners like this:
const title = document.querySelector("#title")
title.onclick = function() {
  title.style.fontSize = "50px"
}
Event Bubbling and Event Delegation
Event Bubbling and Event Delegation are processes by which your interaction with the DOM affects all elements affected by a given interaction. This is to say that any action you perform to an element on a page is also performed on any parent element(s) of said element. For example, say we have the following html:
<body>
  <div class="container">
    <header>
      <h1>Title</h1>
      <nav>
        <ul>
          <li><a href="#">Nav link</a></li>
        </ul>
      </nav>
    </header>
  </div>
</body>
We now have the ability to click the a element. But, when we click that element, we are clicking all containing elements. So we're also clicking li, ul, nav, header, div.container, and body.
Conversely, behavior can be observed from a parent container and delegate behavior to a child element using event.target in the DOM API. Like so:
<body>
  <h1 class="someClass">Title!!!</h1>
  <p>I don't have class :,(</p>
</body>
const body = document.body
body.addEventListener("click", function() {
if (event.target.classList.contains("someClass")) {
console.log("you pressed the thing that was a class list of 'someClass'")
}
})Functions
In JS we have two ways to declare a function, function declaration and function expression. Function declarations look like this:
function myFunc() {
  // Do something with stuff
}
Where function expressions look like this:
const myNewFunc = function() {
  // Do something new with new stuff
}
We now have arrow functions. Let's take a look!
Let's refactor a function with no arguments and make it an arrow function:
function logToTheConsole() {
  console.log(`Print me to the console!`)
}
Arrow functions with no arguments
const logToTheConsole = () => console.log(`Print me to the console!`)Let's do the same with functions that have one argument:
function numberSquared(x) {
  return x * x
}
Arrow functions with one argument
const numberSquared = x => x * xFinally, let's see this in action with many arguments:
function addTwoNumbers(x, y) {
  return x + y
}
Arrow functions with many arguments
const addTwoNumbers = (x, y) => x + yFinal Refactors
Look how much smaller our code base can become
const logToTheConsole = () => console.log(`Print me to the console!`)
const numberSquared = x => x * x
const addTwoNumbers = (x, y) => x + y
Default Function Parameters
We can provide default parameters for our functions in ES2015+ the same way we can with ES5 style JS. But as with most things in ES2015, it's far easier. For example:
// ES5 syntax
function add(a, b) {
  if (a === undefined) a = 42
  if (b === undefined) b = 86
  return a + b
}

// ES2015 syntax
const add = (a = 42, b = 86) => a + b
Callbacks
That anonymous function that we pass to setInterval is called a callback. Callbacks are used to execute specific behavior with a value that has been passed to it. Let's explore:
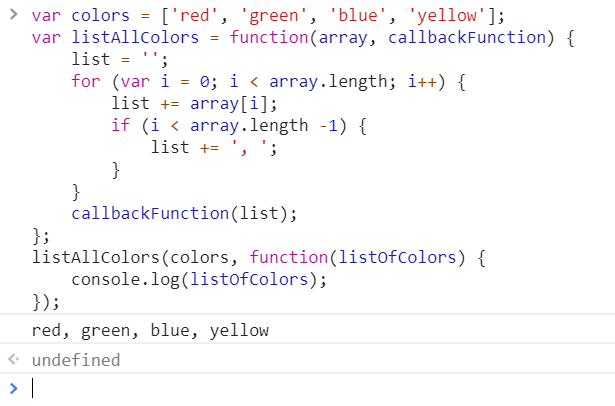
const colors = ["red", "green", "blue", "yellow"]

function listAllColors(array, callback) {
  list = ""
  for (let i = 0; i < array.length; i++) {
    list += array[i]
    if (i < array.length - 1) {
      list += ", "
    }
  }
  callback(list)
}

listAllColors(colors, function(listOfColors) {
  console.log(listOfColors)
})
This prints the concatenated array to the console:
Destructuring
ES2015 gives us a great tool for declaring variables called destructuring. This is a way to declare individual variables from and object. Since Arrays are actually objects in JS, this applies to them too. Let's see it in action:
// ES5 syntax
const list = [1, 2, 3]
const a = list[0]
const b = list[1]
const c = list[2]

console.log(a + b + c) // prints 6

// ES2015 syntax
const list = [1, 2, 3]
const [a, b, c] = list
console.log(a + b + c) // also prints 6
Object Destructuring
The same works for objects. This is great if you just want to assign a few values from an object to single, local variables.
// ES5 syntax
const obj = { name: "Donny", age: 31, favColor: "green" }
const name = obj.name
const favColor = obj.favColor
console.log(name + "s favorite color is " + favColor)

// ES2015 syntax
const { name, favColor } = { name: "Donny", age: 31, favColor: "green" }
console.log(`${name}s favorite color is ${favColor}`)
Now for some...
PRACTICE!
There's plenty more to understand about JavaScript. For this project, clone this JS challenge exercise from here. ENJOY!